I've been very lax about posting to this blog. Lately, I've become addicted to tumblr and have two blogs there where I post sketches and other items of interest with minimal writing attached (
vincentdesjardinsdraws and
Jumbled Planet).
But, today I wanted to post and talk about the image I submitted for this week's "Illustration Friday," challenge which is the word 'Lost.' I was originally inspired to create this illustration by a photo of a spooky, moss covered forest (you can see the original image, below left). I created the final image in Painter, but before I began, I opened the photo in Photoshop and created a threshold layer so that I could better see the lights and darks in the image. I then used this as a visual reference to create the darkest shapes in my image.
From there, I began sketching in Painter 12. Originally I had thought to do this as a digital oil or gouache painting, but then I thought it might be more dramatic to do it as a black and white digital pen and ink drawing. From the very start, I knew I had wanted to have a rabbit in the image. I like rabbits and I thought it might provide some tension to show an innocent looking little rabbit lost in this rather imposting and dramatic looking forest.
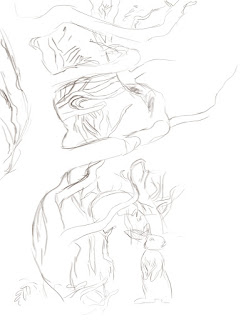 |
| Beginnings of digital pencil sketch |
 |
| In the above image, I've begun to map the darkest areas |
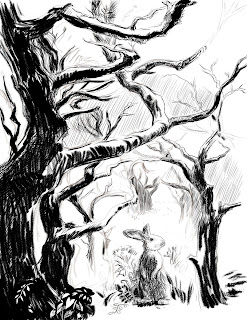
After I had blocked in the darkest trees, I added additional layers to fill in the background shading. By having the cross-hatched background shading on a different layer, I could erase areas of it without damaging the main shapes. This came in very handy when I decided to add some shafts of sunlight to the image. As I continued to work, I began to deviate from the original photo and started adding branches and leaves where I thought the image could use some texture and visual interest.
 |
| Here, I'm filling in the background with lots of cross hatching. |
 |
As I darkened the background, I decided to add some rays of sunlight, to help guide the viewer's eye toward the rabbit.
Finally, after finishing the image in black and white, I decided it might be fun to do a colored version. Since I had created the black and white image on several layers it was easy to add another layer underneath to create the color. All I did was flatten the black and white layers to a single layer and changed the resulting layer to a 'multiply' blending mode, which allowed the color to show through in the white areas.
Above is the finished piece and below, you can see what the watercolor layer looks like without the pen and ink layer.
|


